For the Cost of an Iphone, this DIY Wind Turbine Can Power Help Power A Your House
Written by: Arron J. Staff writer @ Hyggehous.com

Photo Gallery
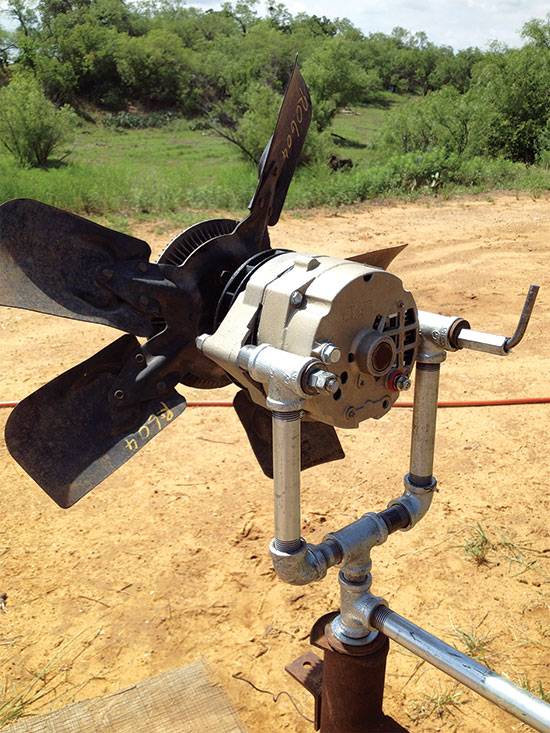
Have you been considering alternative power options?
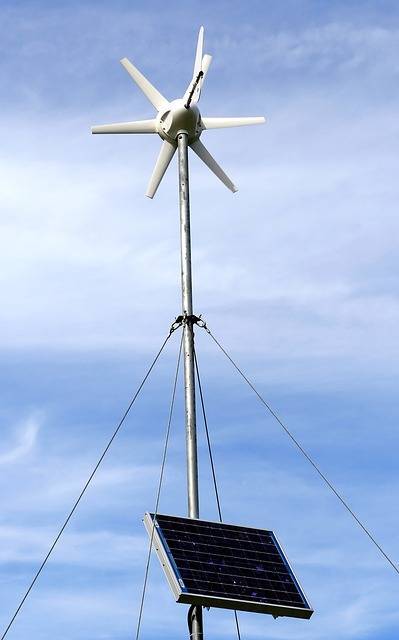
If you've been doing your research, you've probably found that solar panels and wind turbines can cost quite a lot of money. But did you know you can make some of these items yourself? The best part is that you don't have to go out and spend a bunch of money as you can turn a used car alternator into alternative energy for this affordable and easy idea. Shop Tiny Homes If you're considering an off-grid life, this DIY idea is just the project you need to check out. For this DIY idea, you can build a homemade wind generator, which will create electricity as long as the wind is blowing. You’ll be able to light up your living space, or power up your barn, or use a generator to keep all your vehicle batteries completely charged. Robert D. Copeland who shared his detailed tutorial says that he is able to power his off-grid cabin using solar and wind power that cost him less than $1,000 to put together. It powers his fans, lights, stereo, fridge, TV and even a disco ball on occasion. So by having this DIY wind turbine you too could be able to supplement some of your electricity with power generated by the wind. You could power your small cabin or tiny house, maybe even your RV or campsite depending on what you need.
Here are Robert D.
Copeland's detailed instructions so you can make a DIY wind turbine yourself:
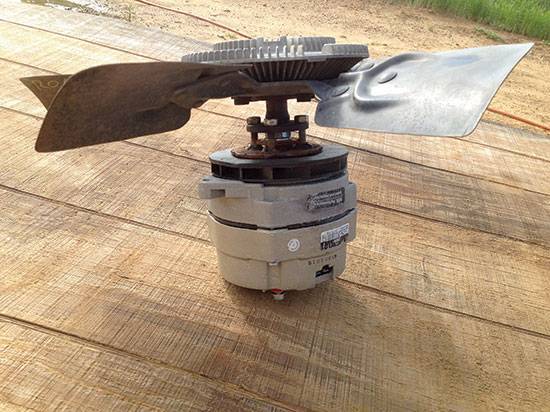
"The blades for the wind generator are re purposed from a vehicle fan clutch.
To attach the blades to the alternator, you can weld the fan clutch hub directly to the alternator hub — just make certain the fan is perfectly in line with the alternator shaft. Also, make sure the alternator’s built-in wire plug-ins are located on what will be the bottom of the generator. If you don’t have access to a welder, you can connect the fan clutch to the alternator using the following materials:
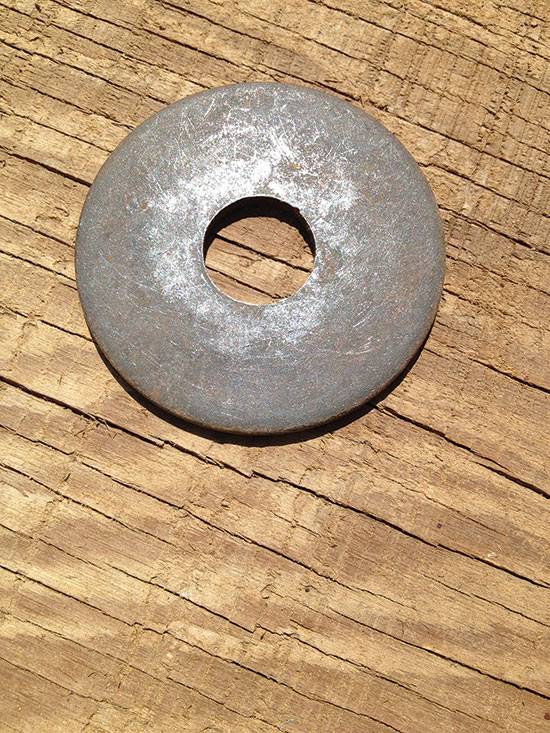
• 5/8-inch-by-3-inch washer, 3/16 inch thick
• Electric drill
• 1/4-inch thread tap
• Drill bit that corresponds to specific thread tap
• (4) 1/4-inch-by-1-1/2-inch to 2-1/2-inch bolts with corresponding nuts and lock washers
Create a union using the 3-inch washer and the four bolts, which will fasten the fan clutch and alternator together.
Drill four holes into the washer to match the holes in the fan clutch, and then cut threads in the holes using the 1/4-inch tap. Screw the bolts into the holes. To determine the length of the bolts you’ll need, stack the fan on top of the alternator with the fan pulley resting on the alternator pulley and both shafts in line. Measure the length along the two shafts from the back of the alternator fan to the back of the fan clutch hub. Use this length for the bolts. Unscrew the alternator pulley nut, and remove the pulley and small fan. Slide the union that you made from the washer and four bolts over the alternator shaft, with the bolts pointing away from the alternator. Then, reattach the alternator fan and nut onto the shaft, leaving the pulley off. The large nut will hold the union in place. Attach the fan clutch assembly to the bolts now protruding from the alternator, and tighten the nuts with lock washers in place.
Bracket Assembly for Mounting the Alternator
If you have a welder, making a bracket is simple.
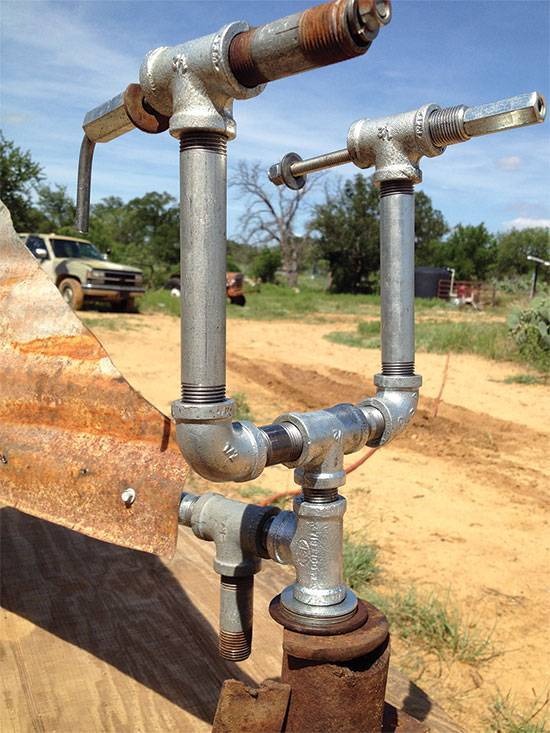
I used 1-inch square tubing for all the bracket pieces and a 2-foot-long piece of 1-inch pipe for the rotating stem that fits inside the pole. If you don’t have a welder, fear not. The bracket assembly can be put together with 1/2-inch galvanized pipe and fittings. Here’s a list of the pipe fittings you’ll most likely need:
•(5) 1/2-inch tees
•(2) 1/2-inch elbows
•(2) 1/2-inch-by-12-inch nipples
•(2) 1/2-inch-by-6-inch nipples
•(2) 1/2-inch-by-1 1/2-inch nipples
•(2) 1/2-inch-by-2-inch nipples
•(3) 1/2-inch-by-close nipples
A tail fin must be attached to the 12-inch nipple at the back of the bracket to spin the generator around and line it up with the wind’s direction.
You can cut a fin that’s about 1 foot high and 2 feet long out of old tin siding or roofing with tin snips or a cutting torch — a right-angle-triangle shape works best. If you’re using corrugated metal, be sure to cut the fin so the corrugations run horizontally. After the fin is cut out, lay it on top of one of the 12-inch nipples and drill three pilot holes through the bottom of the tail fin and into the side of the nipple. Use three screws (steel roofing screws work well) to affix the tail to the nipple.
Wind Generator Tower
I used an old 20-foot-tall television antenna tower along with a 2-1/2-inch-diameter pipe for the top piece.
You’ll also need to weld or bolt a stop at the top of the tower that will make contact with a stop on your bracket assembly. The stops will only allow the generator to turn 360 degrees clockwise or counterclockwise so your cable doesn’t get twisted around the pole and tower.
A joint of 2-3/8-inch heavy-gauge metal tubing anywhere from 10 feet to 20 feet in length (or height, once erected) makes for a good tower after it’s attached to a building or other sturdy, stationary structure.
Make sure it’s secure, and consider using guy-wires if necessary.
After you have all the generator components fastened together and attached to your bracket assembly, mount it to your unerected pole or tower.
Insert the pipe on the generator bracket assembly into the pole or the top of your tower. Use two steel washers stacked together to create a smooth surface to act as a bearing between the generator and tower. Attach the positive and negative wires to the alternator and secure them to the bracket and along the tower with zip ties, baling wire, or duct tape. (It isn’t really homemade unless it has a little baling wire and duct tape on it somewhere, now is it?) Make sure to leave enough slack in the wires for the wind generator to rotate 360 degrees.
You’ll likely need assistance standing the tower and generator upright as it will be pretty heavy.
Ropes and a come-along will help if you’re going up fairly high. If it’s always windy in your location, you’ll only need to be high enough off the ground to keep the moving parts safely overhead. Securely fasten your tower in place. The wind can be deceptively strong, so don’t cut corners on this final assembly stage. After you’ve erected your wind generator, connect the wires to your battery bank with a charge controller in between to prevent under- or overcharging.
Now, you’ll be ready to hit the lights, crank up the jams, and bust out those old disco moves I know you’ve been saving up for an electric slide with family and friends.
A quick disclaimer: build and use at your own risk.
My generator works fine, but you’re responsible for your work. Good luck and power up!"
Robert D.
Copeland runs The Sunflower, a Texas-based off grid bed and breakfast and he holds permaculture workshops and raises cattle too.

